Feature available for : 🔷 Facilitators 🟨 Administrators
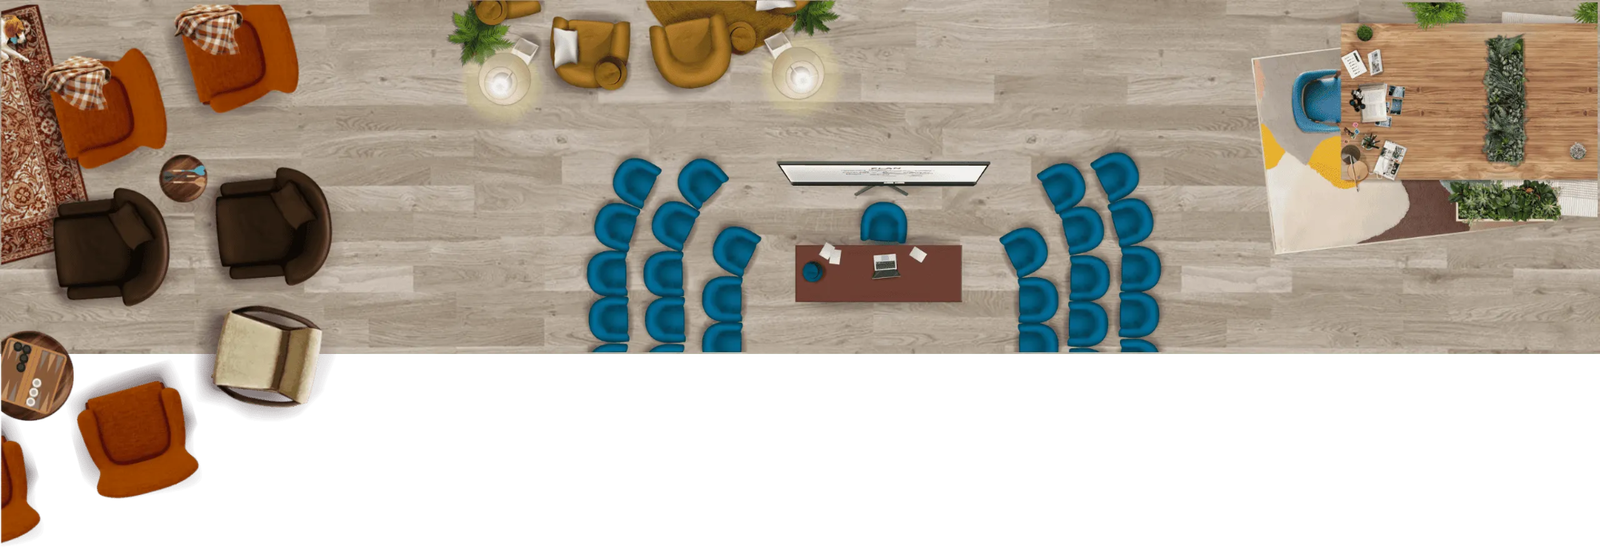
Layouts are the soul of your session, setting the mood, telling participants which tables to use and sometimes even which role to take.


If you're looking to change the background of the space (floor, lawn, marble...), please consult the :
Create and personalize a spaceCustomizing the table
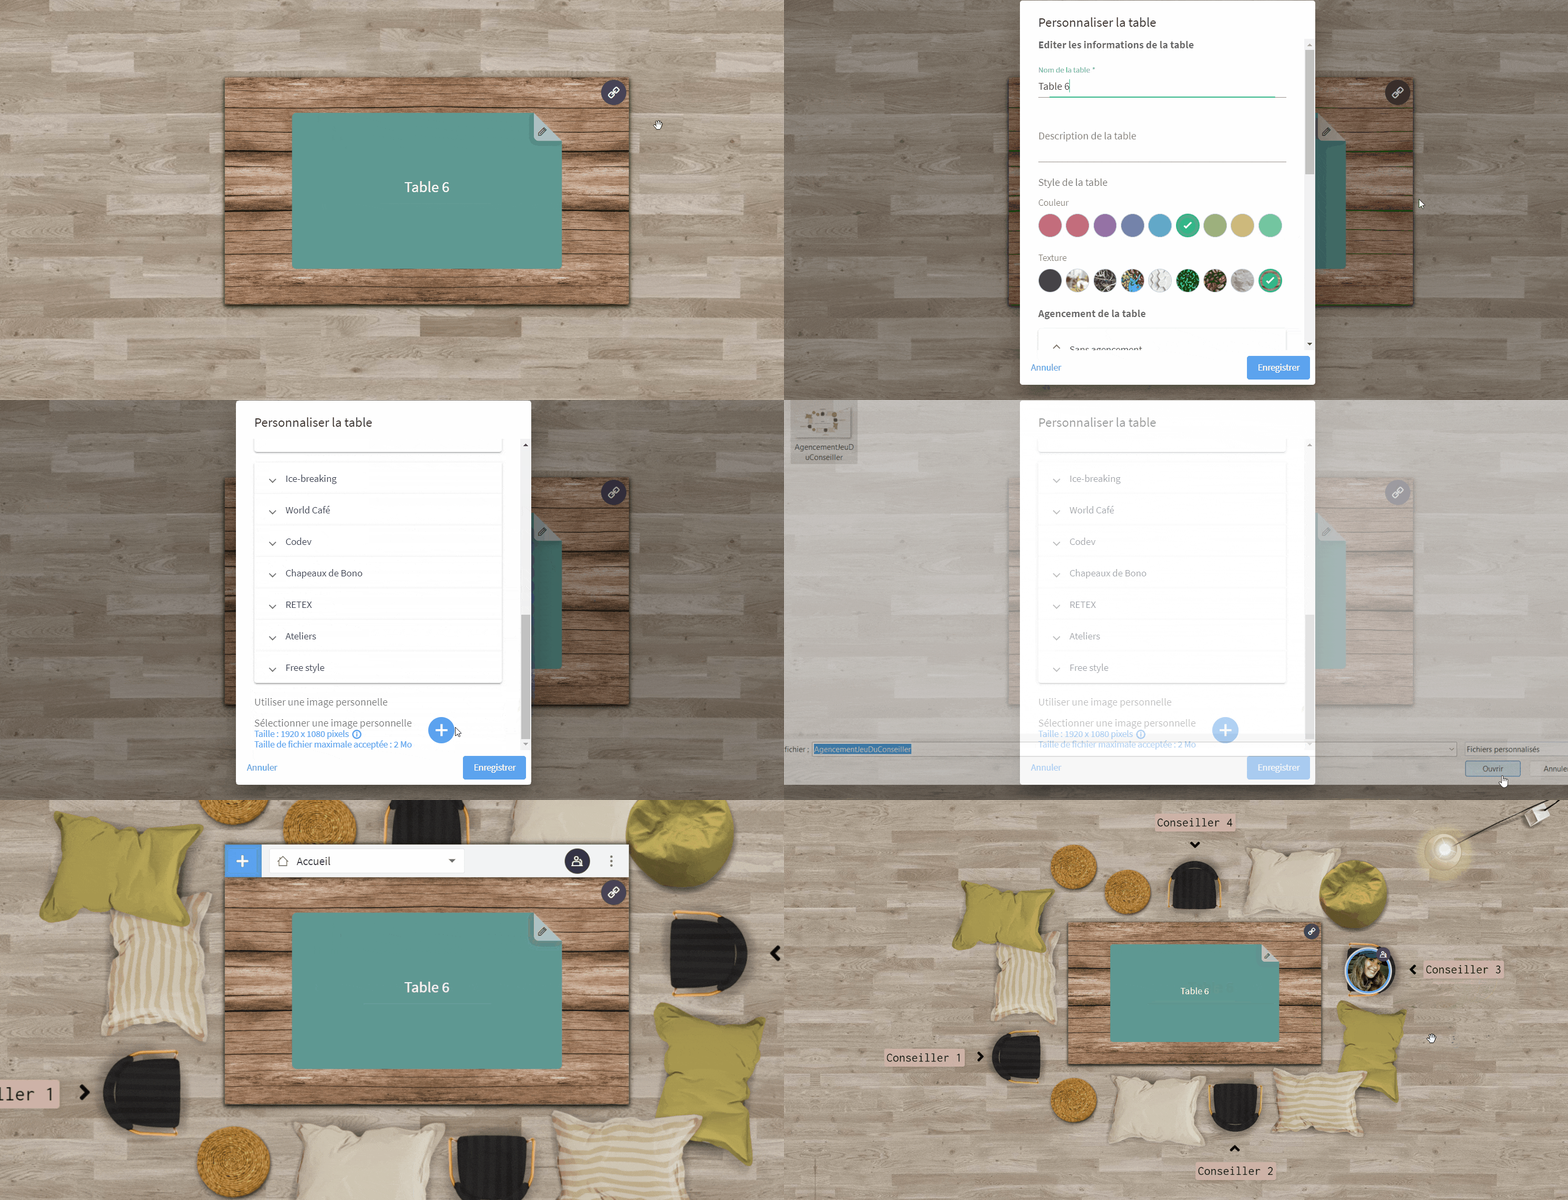
To change the layout of a table, move your mouse over the table ➜ click on the 3 dots ➜ select Customize table ➜ define the table name, add a description, change the table's Home setup, then select a layout from our various categories ➜ click Save to apply changes.
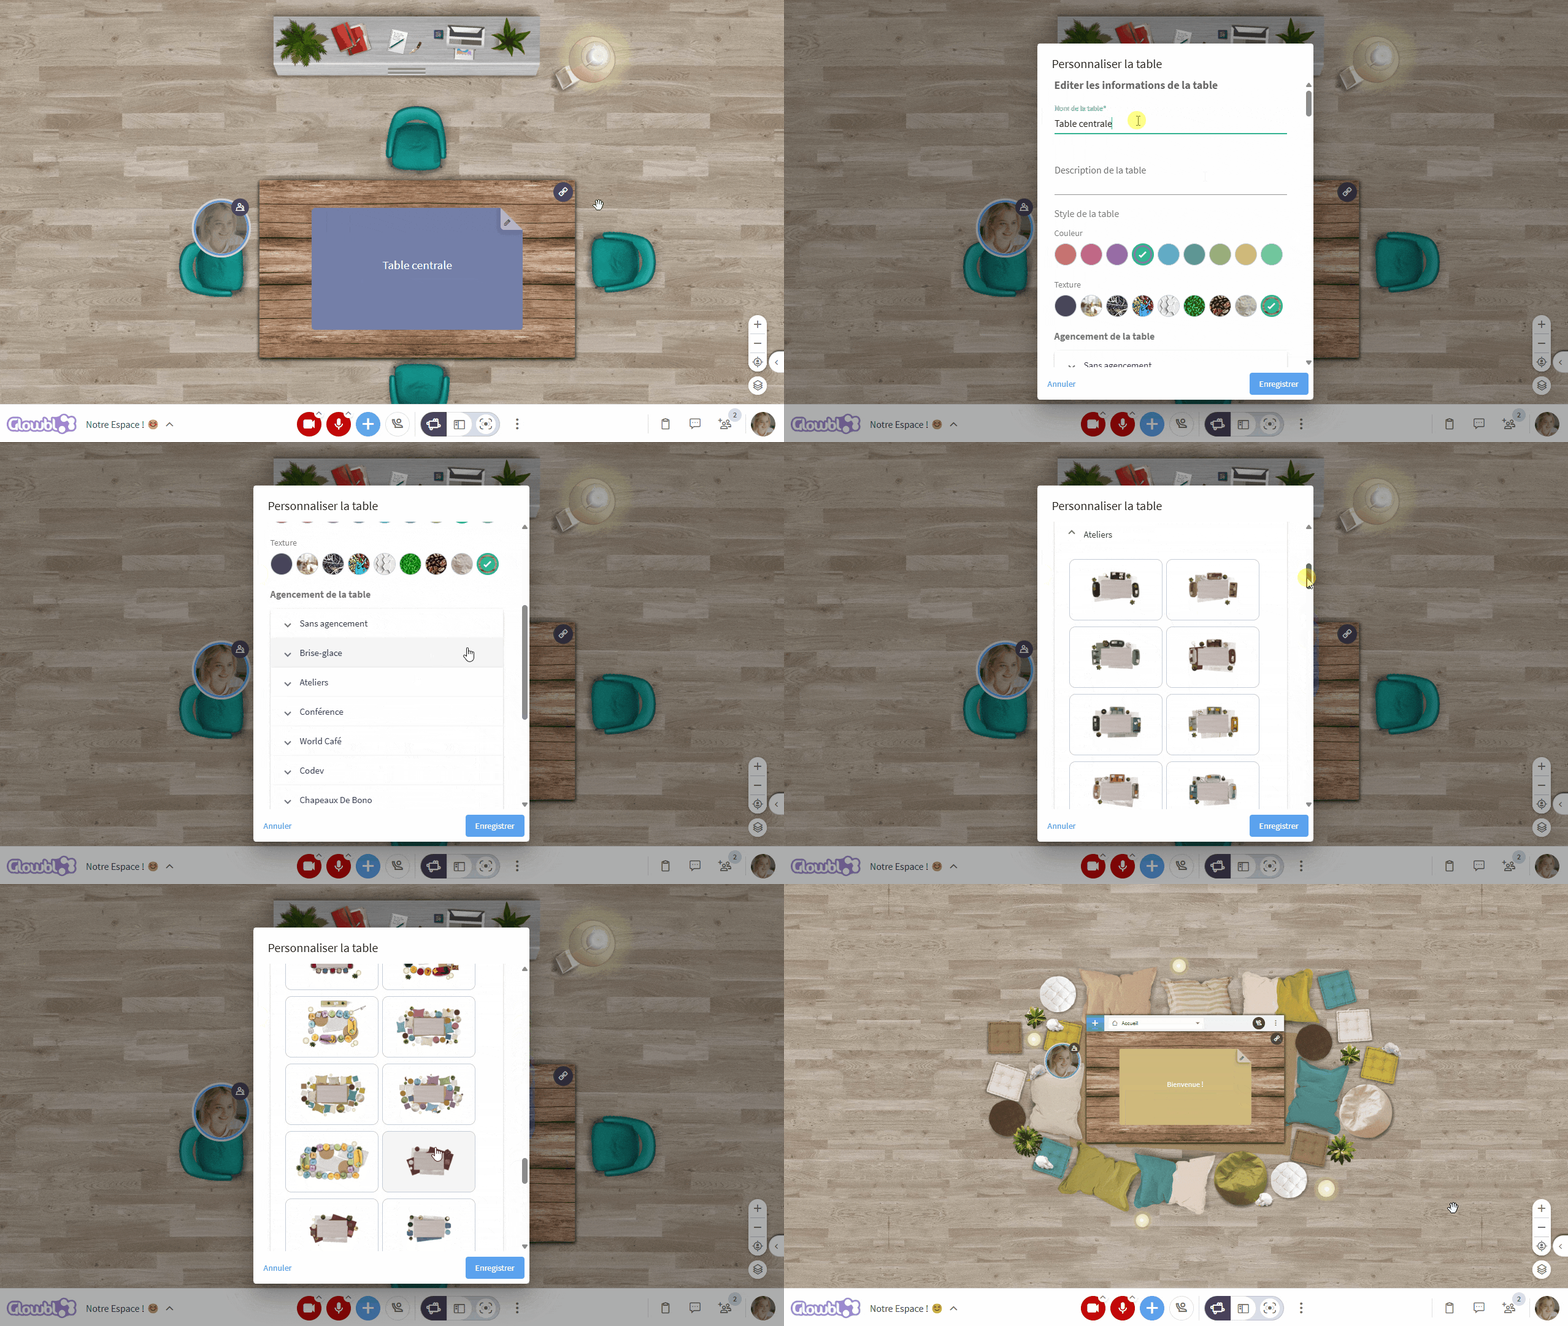

Table names will help participants move around the space more quickly. We recommend giving them group names(Group 1, Group 2) or theme names. Clearly defined table names will also facilitate the playback phase of an activity (see the section on Space contents on the  Projecting and managing content page).

Are you planning to facilitate your session using a Sequence? You can add your layouts directly from the preparation phase. What's more, you can set up different layouts for each step if you wish!
To find out more, click here:
Import your own layouts
Over 120 layouts created by Jean-Claude Figueiras are already available on Glowbl, but you can add your own layouts too!
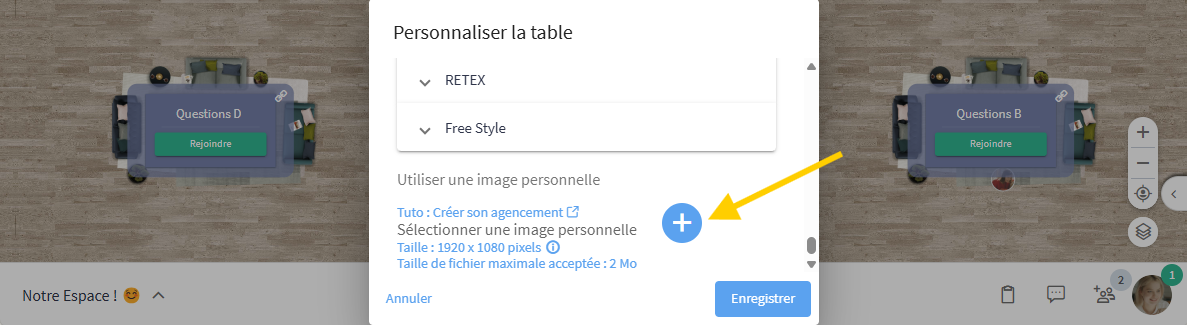
Scroll to the very bottom of the Customize table window ➜ click on the blue plus ➜ select your file from your computer (it must be in 1920 x 1080 format and less than 2MB in size) ➜ click Save.

Feel free to take a look at our Layout Gallery to download designs from our Ambassadors and Creators, or use our Layout Generator to create your own layouts :
 Gallery: LayoutsCreate your own layouts
💡Hints and tips
What if layouts were more than just armchairs!
🍧 Gather participants' feelings with Icebreaker mats
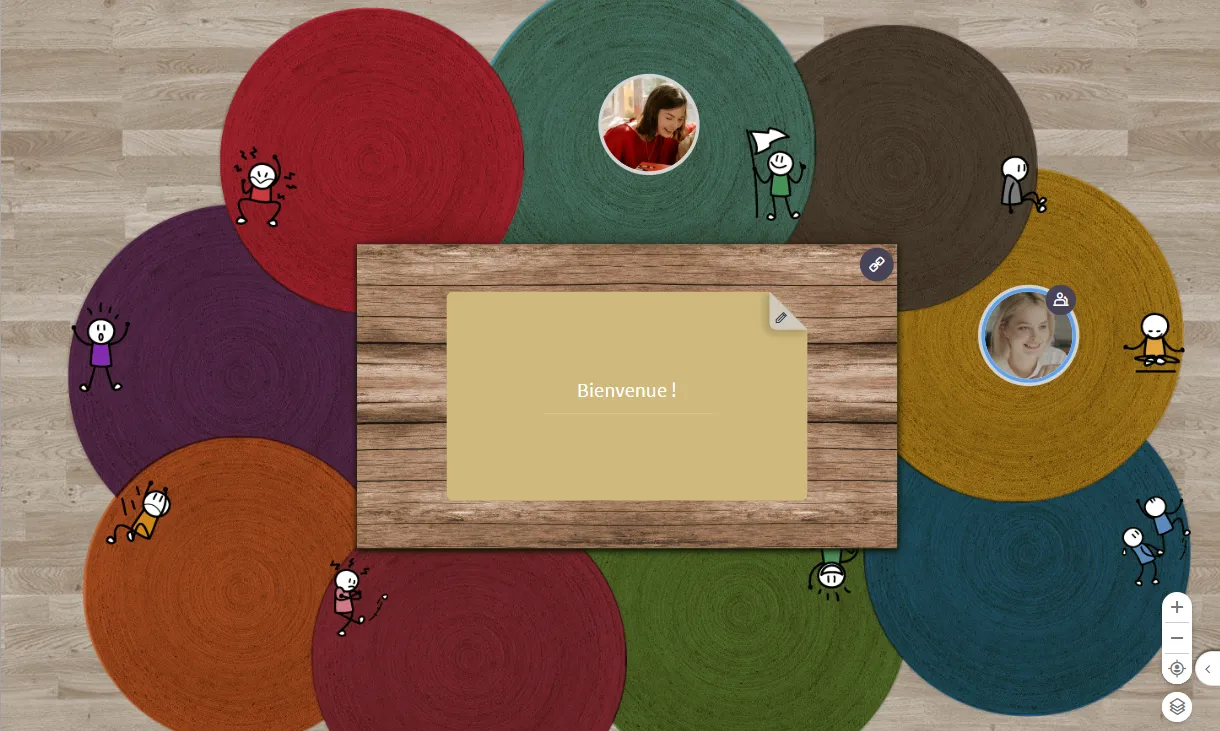
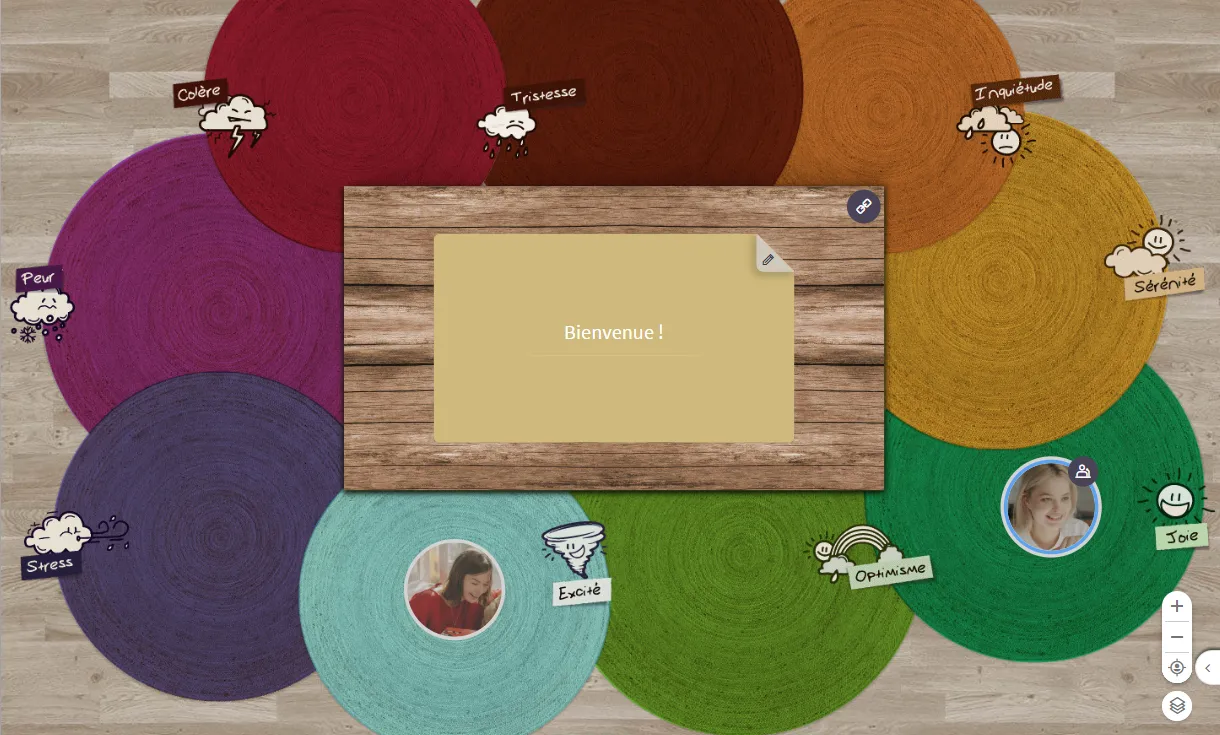
Use these layouts to invite participants to express their feelings, whether about their state of mind on the day or in relation to a specific topic. Two approaches are suggested: one inspired by Wilson's tree, the other by inner weather.
Ask your question, then invite participants to position themselves on the mat corresponding to their mood. Although this ice-breaker is often used at the start of a session, it can also be introduced mid-session to re-energize the group, or at the end of the session to ensure that everyone feels comfortable with the action plan, for example.
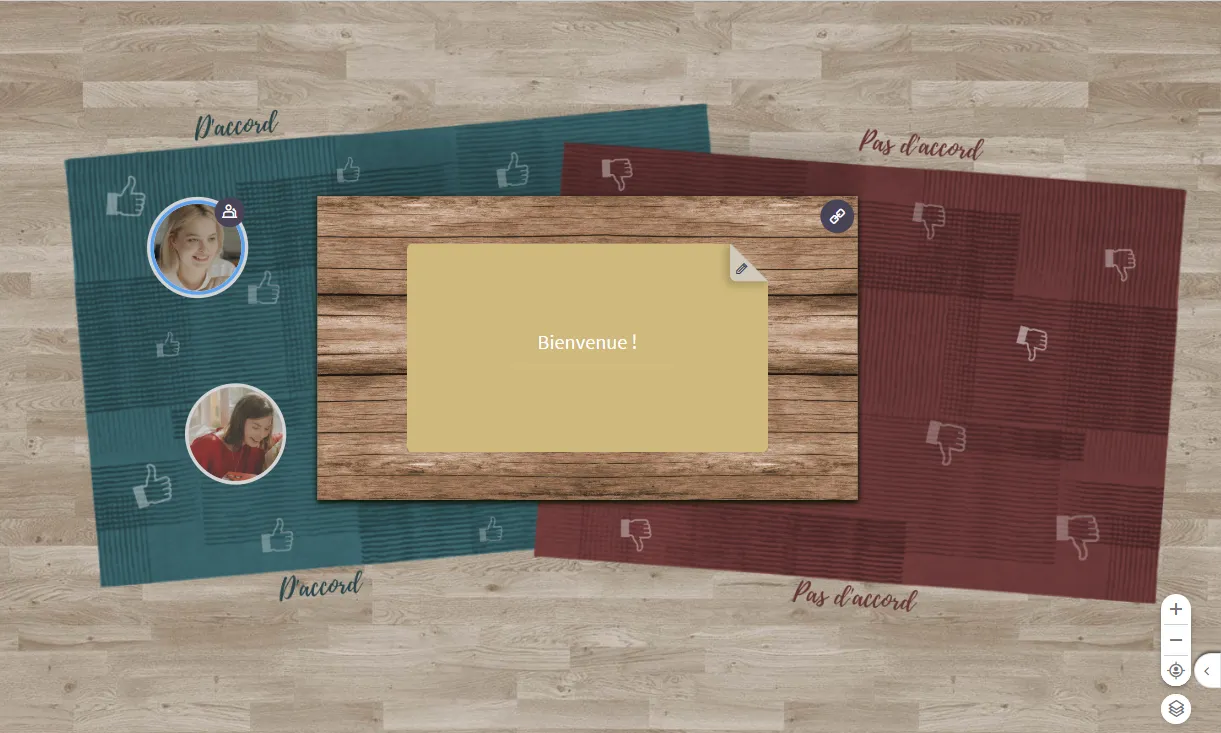
Setting participants in motion to gather their opinions is also the aim of The Shifting Debate activity, and you can reuse this layout in various situations.
✍️ Improving note-taking with the CODEV layout
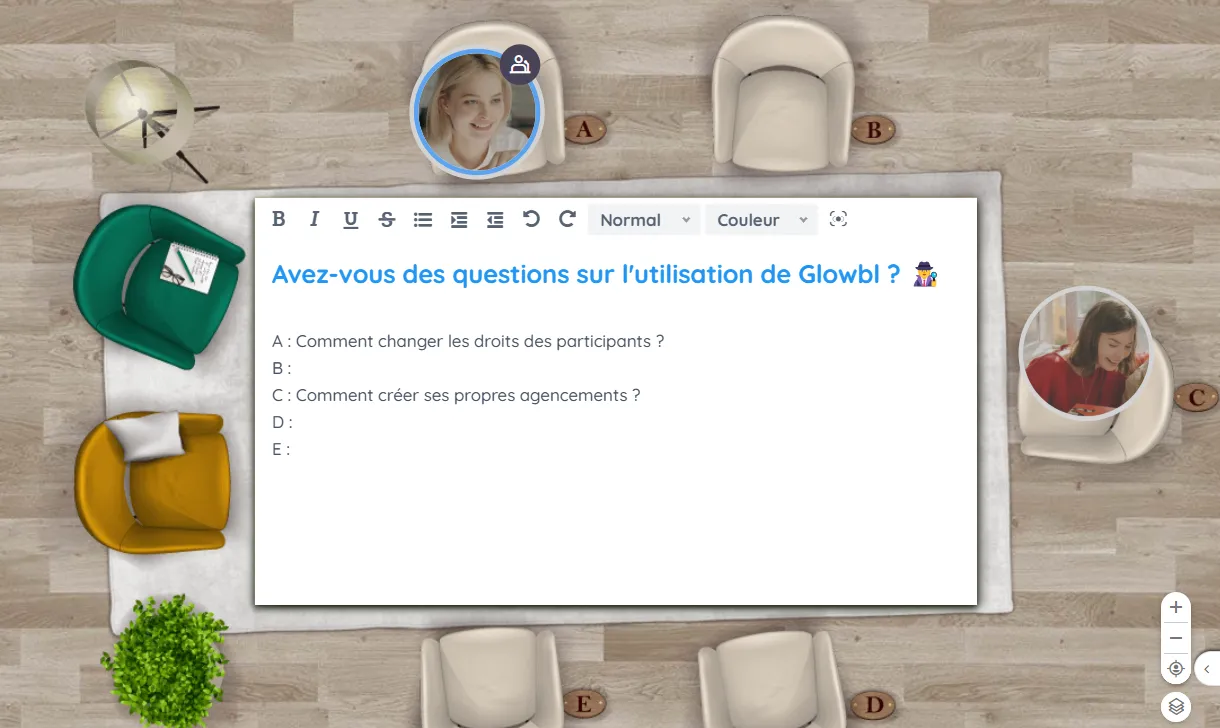
Collaborative notes allow you to gather responses and opinions from all participants. However, collective writing can quickly become chaotic. To structure your note-taking, use the layout designed for the CODEV activity. Each armchair is associated with a letter of the alphabet, which you can transfer to the collaborative note so that everyone writes in their own dedicated space.
🏊 Materialize break times with...a Swimming Pool!
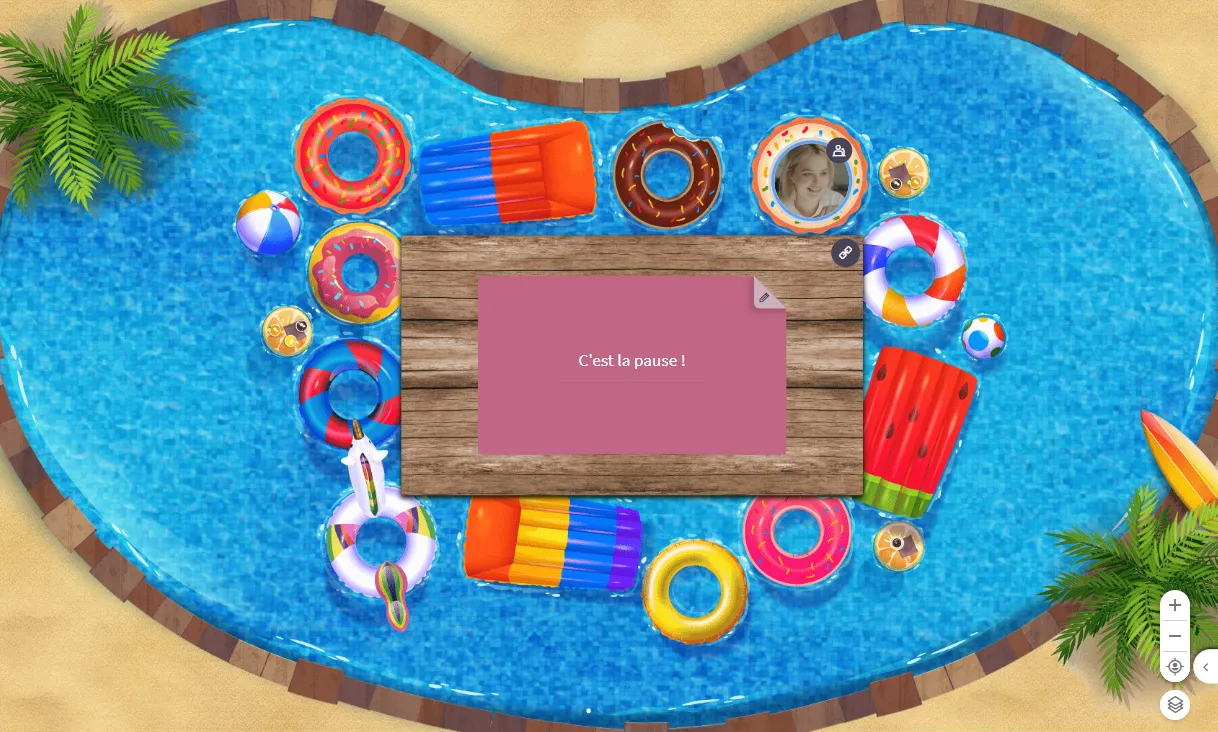
The hardest thing about remote learning is to reproduce the informal moments that participants can have in the classroom, and which help to create group cohesion. The strength of Glowbl compared to other videoconferencing software is that you can create spaces for your learners to have this informal side and get to know each other. Create a table for break times, add an offbeat layout like a swimming pool, and let participants find their way around. You may or may not add content to the table, like an ice-breaker that remains accessible throughout the course, to help participants get to know each other better. Another good practice is to add a visible timer at the bottom of the space, to let participants know that they have time to exchange ideas.
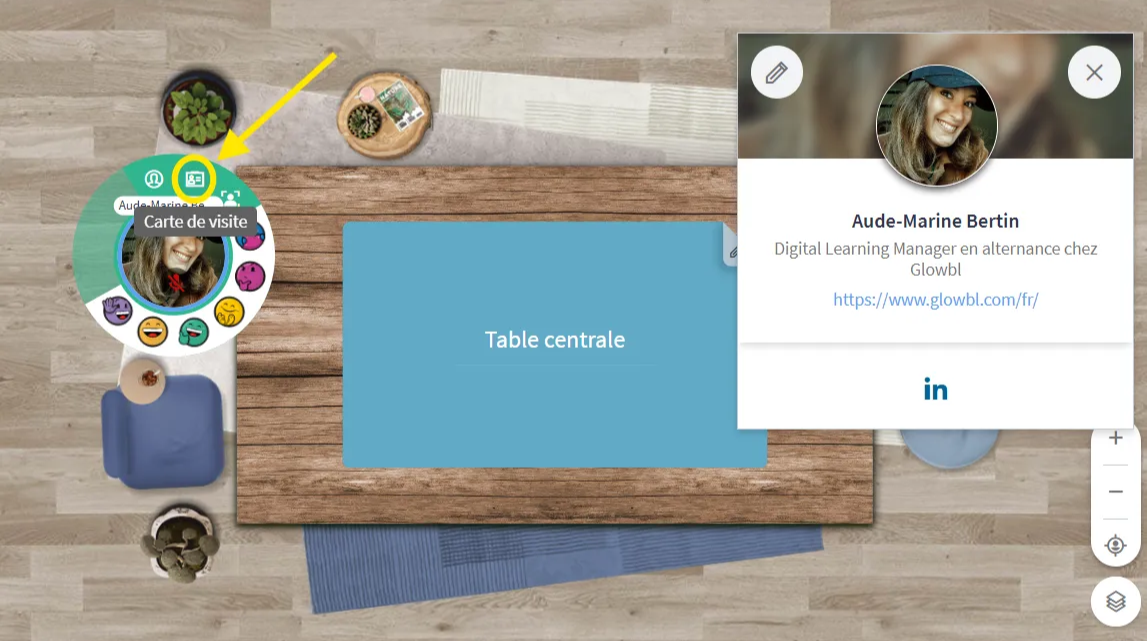
Taking part in a training course, webinar or workshop is also an opportunity to network. And we have the perfect feature for this: the Business Card. It allows participants to add their job title, the link to their website and Linkedin page, as well as a brief introduction of themselves. These business cards can be accessed by hovering over the Bubbles and from the three dots infront of everyone's name in the Participants tab.
🏉 Creating teams naturally with the Team Quiz layout
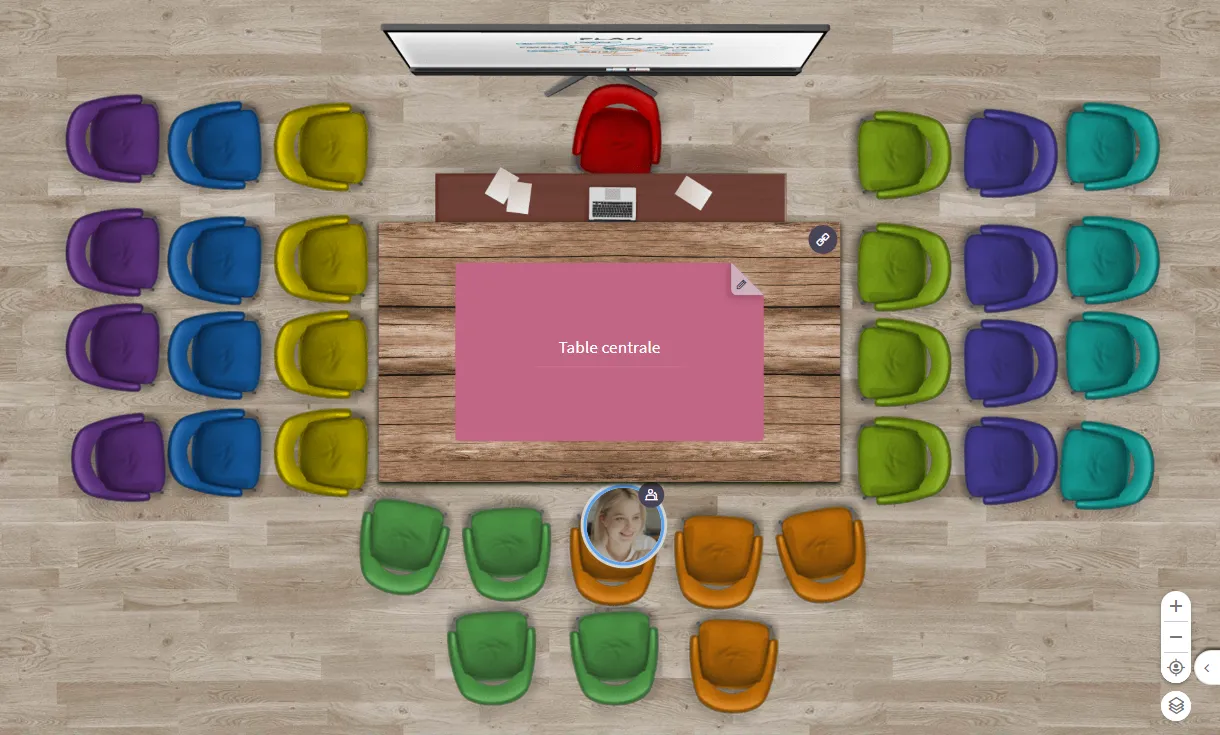
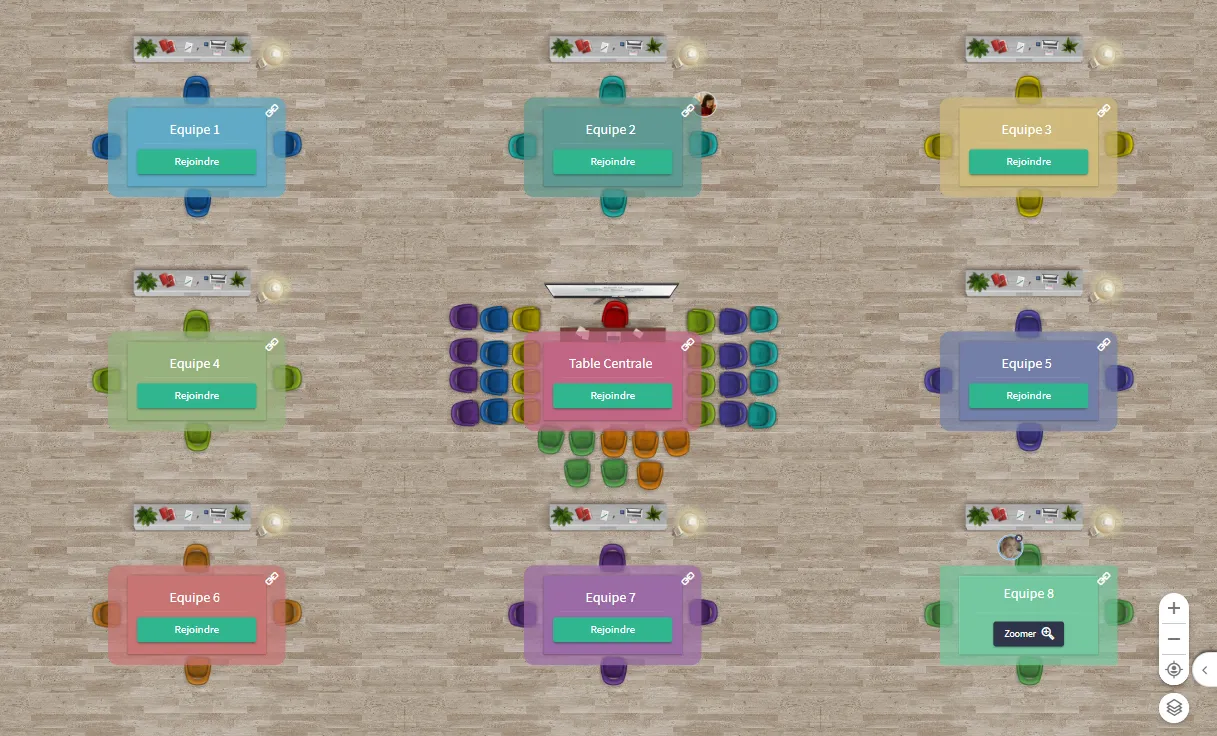
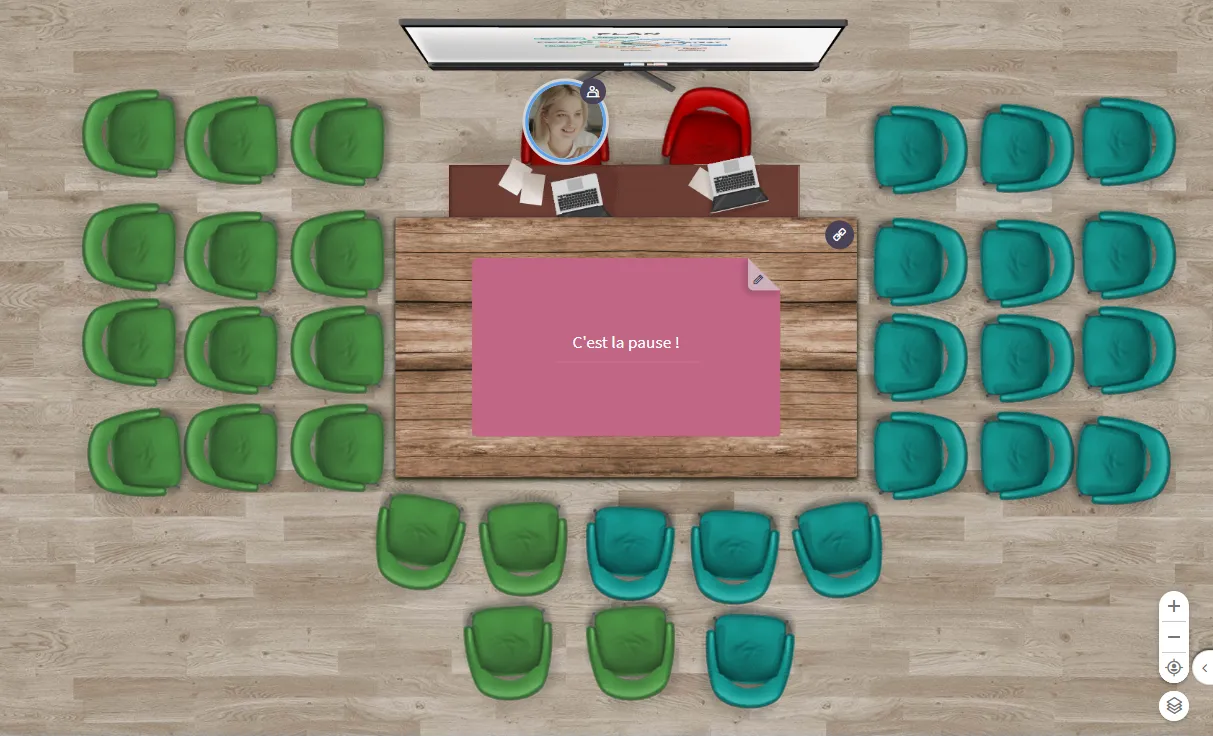
In most cases, all you need to do is ask participants to divide themselves randomly into groups of X people on the different tables to easily form sub-groups. However, you can facilitate this organization by setting up a central table layout like the Team Quiz, where the colors of the chairs indicate the different sub-groups. In this way, their future group is naturally determined by the place they have chosen during the first presentation phase.
You can also use the layout below to form just two distinct groups. This arrangement is useful for quickly structuring a debate by dividing participants into two opposing camps. It can also be used in a shifting debate, where participants are invited to physically position themselves according to their opinion on a given issue.