Feature available for: 🔷 Facilitators 🟨 Administrators

Recording your sessions on video can be useful, whether to offer absentees the opportunity to catch up on content, or to create an archive that can be accessed at any time. For trainers, speakers or presenters, recording can also be used to review and improve your performance by analyzing your interventions (don't forget to activate your microphone and camera!).
Glowbl also includes the option of creating a transcript of your exchanges, which will enhance your post-meeting productivity. Quickly search for key words, decisions or specific actions in the text, review important points raised and, above all, generate minutes and action plans from this transcript in an instant with your favorite AI.

This feature is covered in this video tutorial :
Launch a video recording or transcript(beta)
Glowbl lets you record what's happening at a specific table.
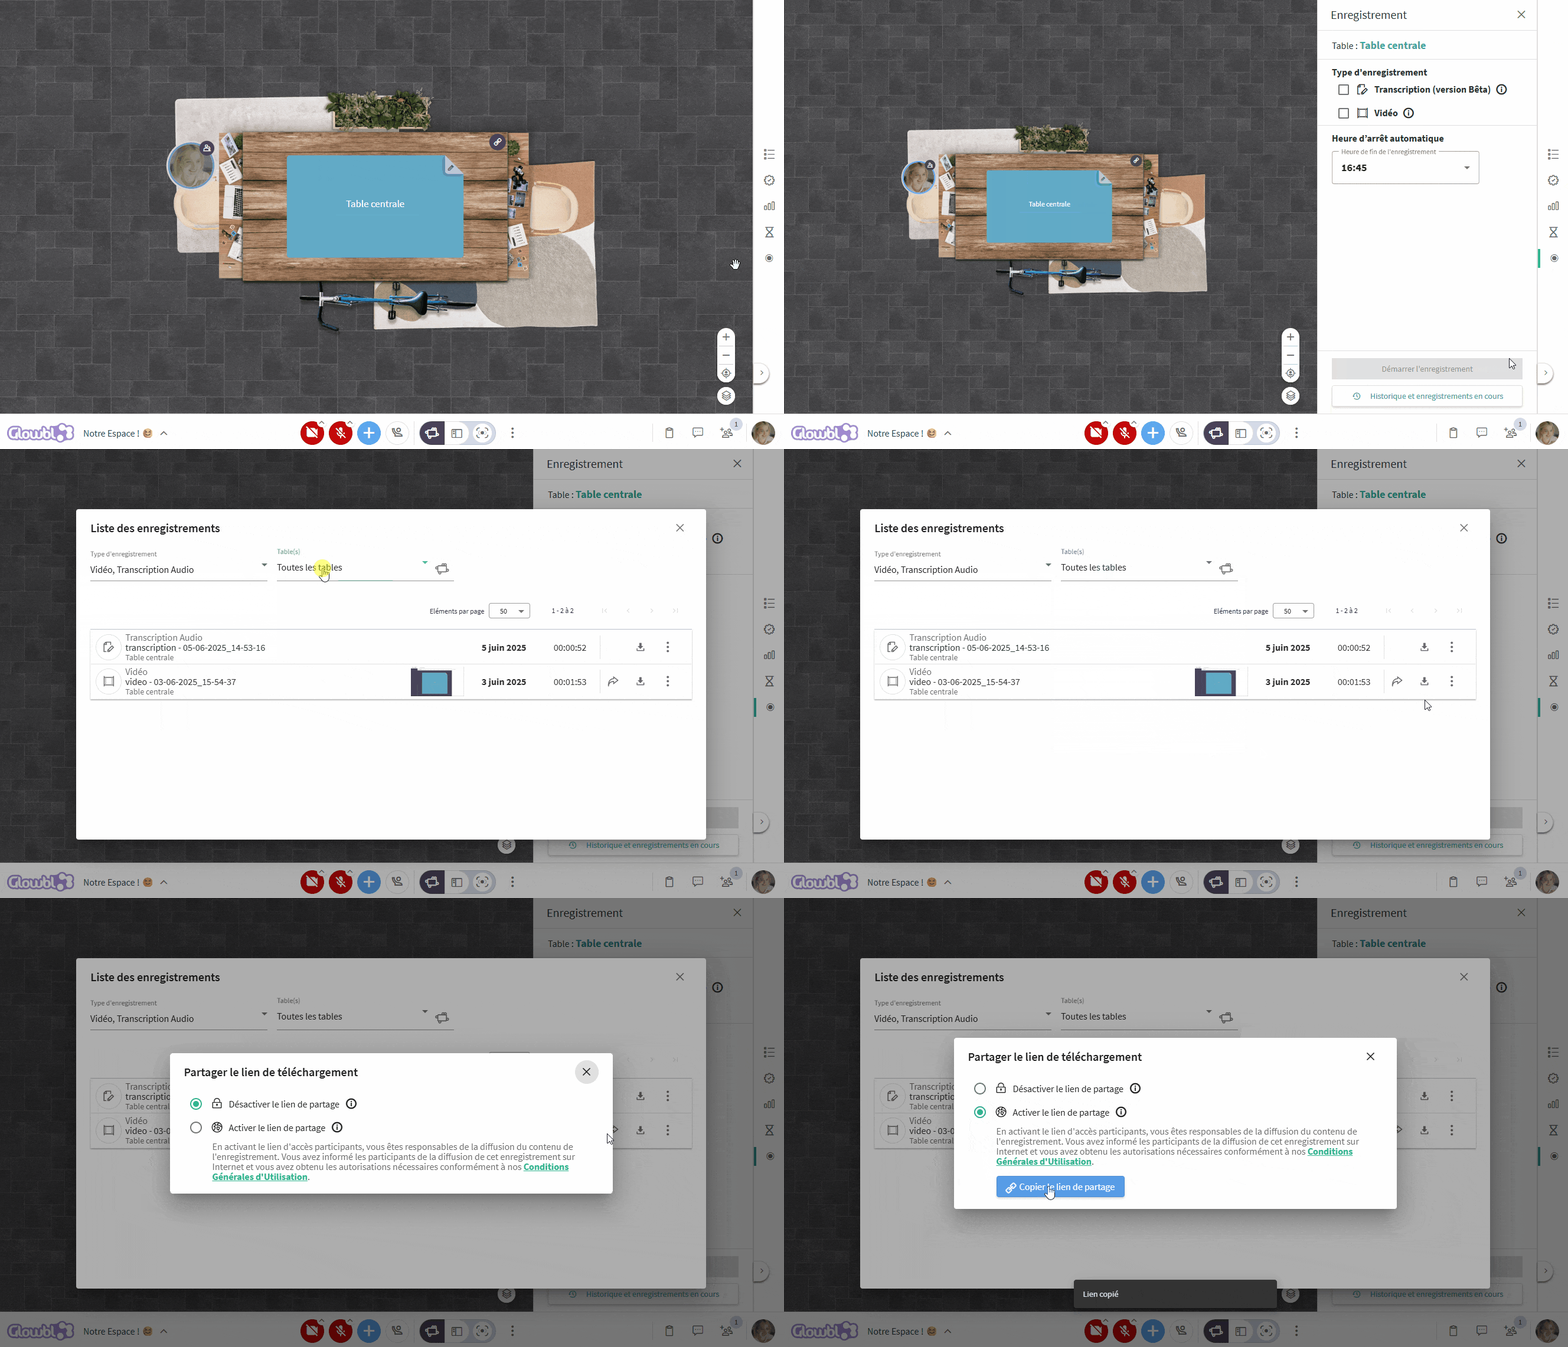
Join the table you wish to record ➜ Click on the target-like icon (Recording) in the right sidebar ➜ Select Transcription or Video then options* ➜ click Launch Recording.

*Options:
- When selecting Transcription you simply need to choose the spoken language (French is the default). By default, the recording will stop after 4 hours, but you have the freedom to set another automatic end time.
- By selecting video, you can decide whether or not to display the webcams of participants and speakers, or to display the Live Chat thread. Note also that all your video recordings will be in Enlarge Content mode.
- By default, all recordings (video or transcription) will stop after 4 hours, but you are free to set a different automatic end time.
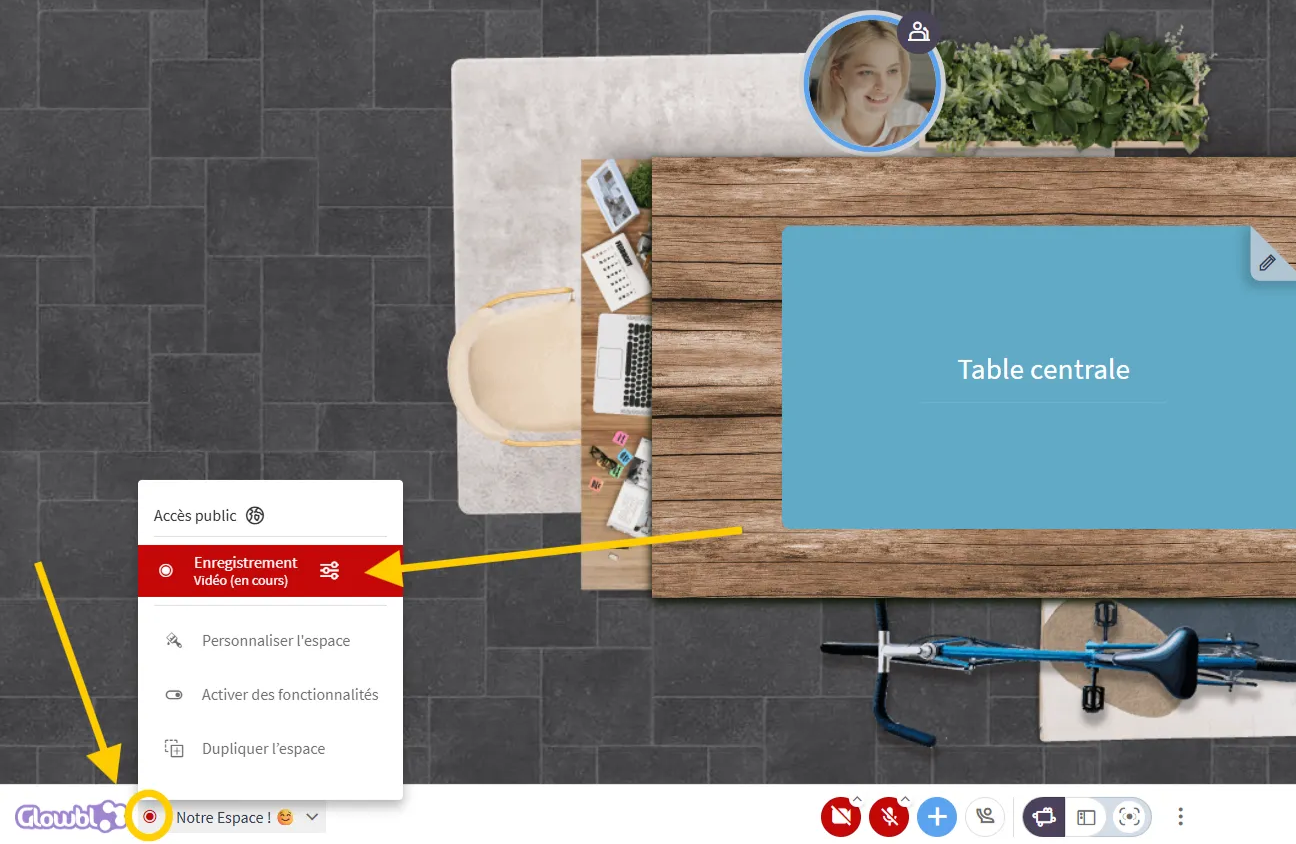
Once you've clicked on Start Recording, the Rec symbol appears at the bottom left of your screen, next to the logo, to indicate that recording has started. It also serves as a shortcut to open the Recording tab:
Hover over the symbol ➜ click on the red area
❌ Manually stop a recording
With the automatic stop set in the previous step, you normally don't have to do anything. But if your session ends early you can stop the recording manually.
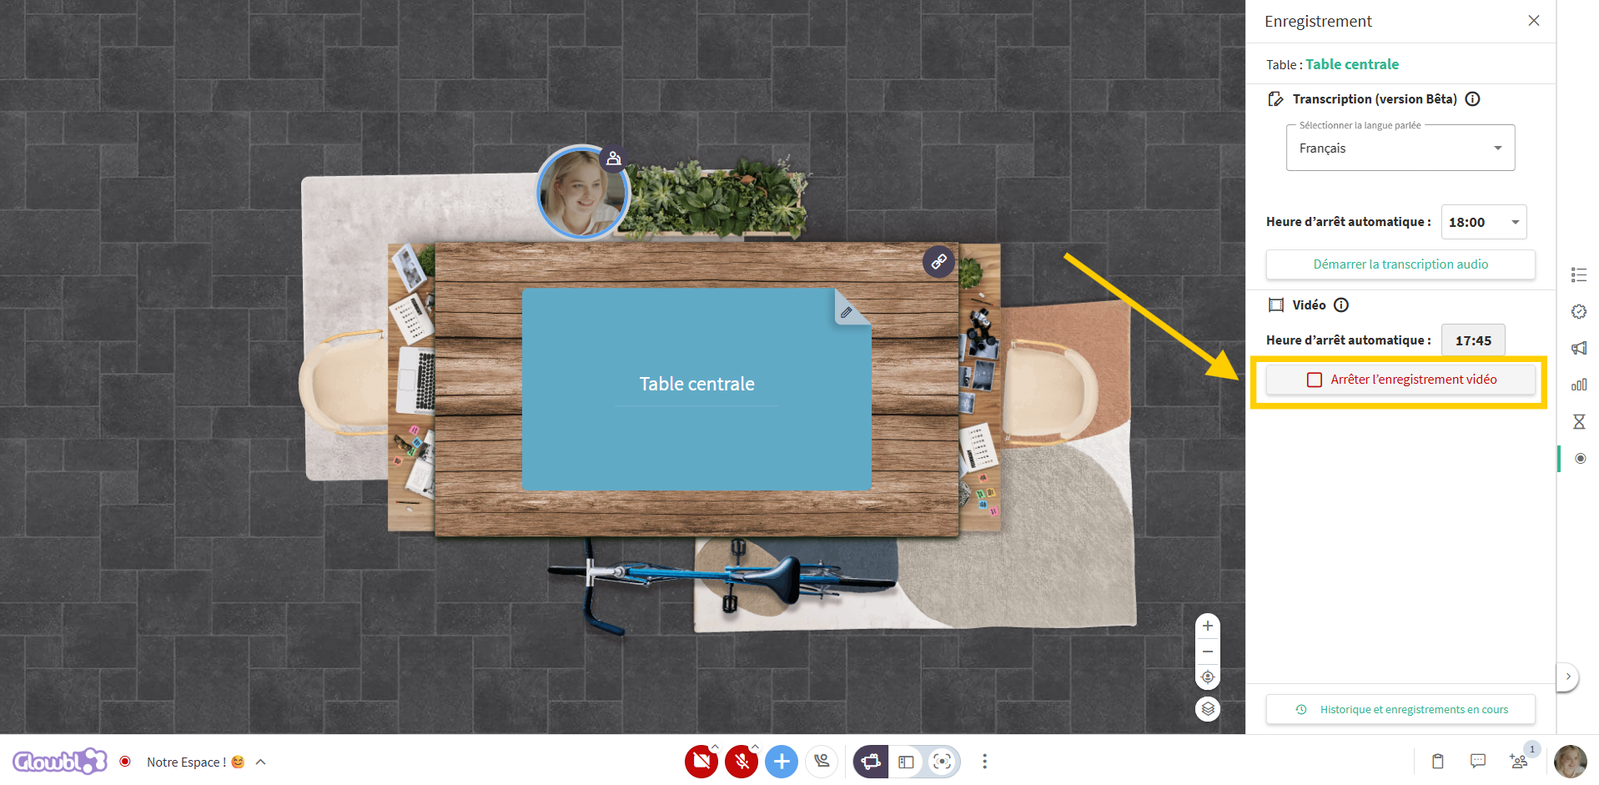
Join the table you're recording ➜ Click on the target-like icon (Recording) in the right-hand sidebar ➜ Click on Stop recording.
Find and share your recordings
Once your recording is complete, it can be easily downloaded by yourself and in the case of videos, shared via a download link to your collaborators, learners, or used as educational content to publish on Youtube or your LMS.
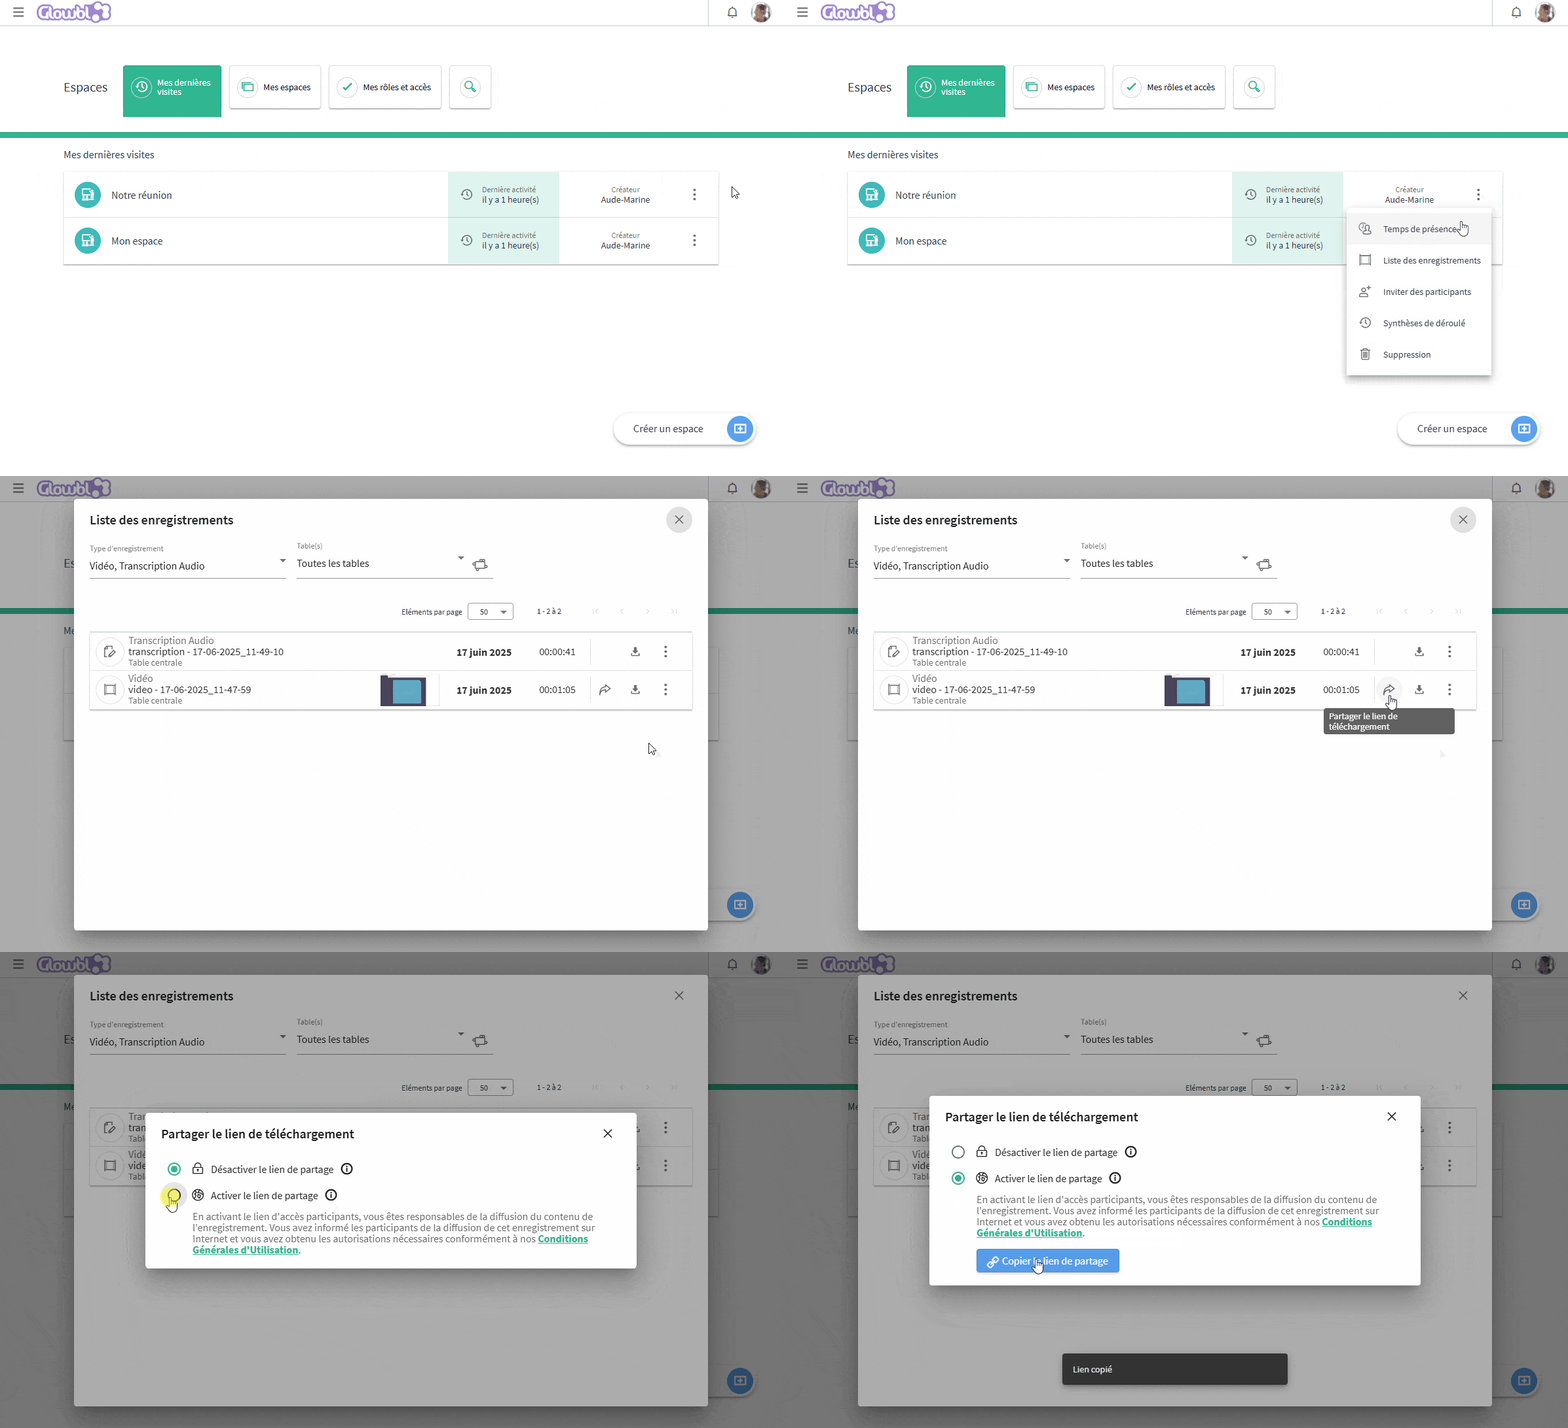
Click on the icon resembling a target (Recording) in the right-hand sidebar ➜ click on History and Current Recordings ➜ Filter on the type of recording, video or transcript, and on the recorded table ➜ click on the Download symbol of the desired video or transcript.
And to share the video click on the share icon ➜ A window opens, authorize link activation ➜ Click 🔗Copythe share link and paste it into an e-mail.
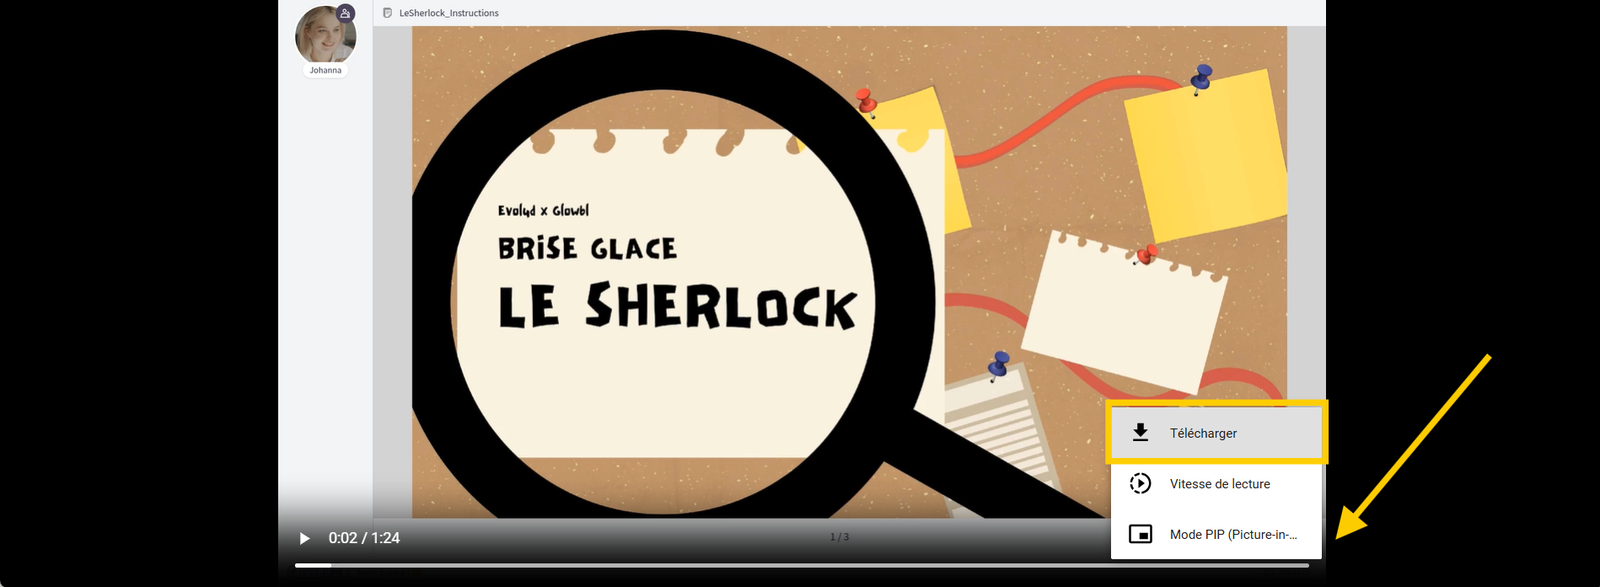
Clicking on your link will open the video in a video player. Participants will be able to download it from the player options.

- All video recordings of a space can also be found directly from the dashboard.
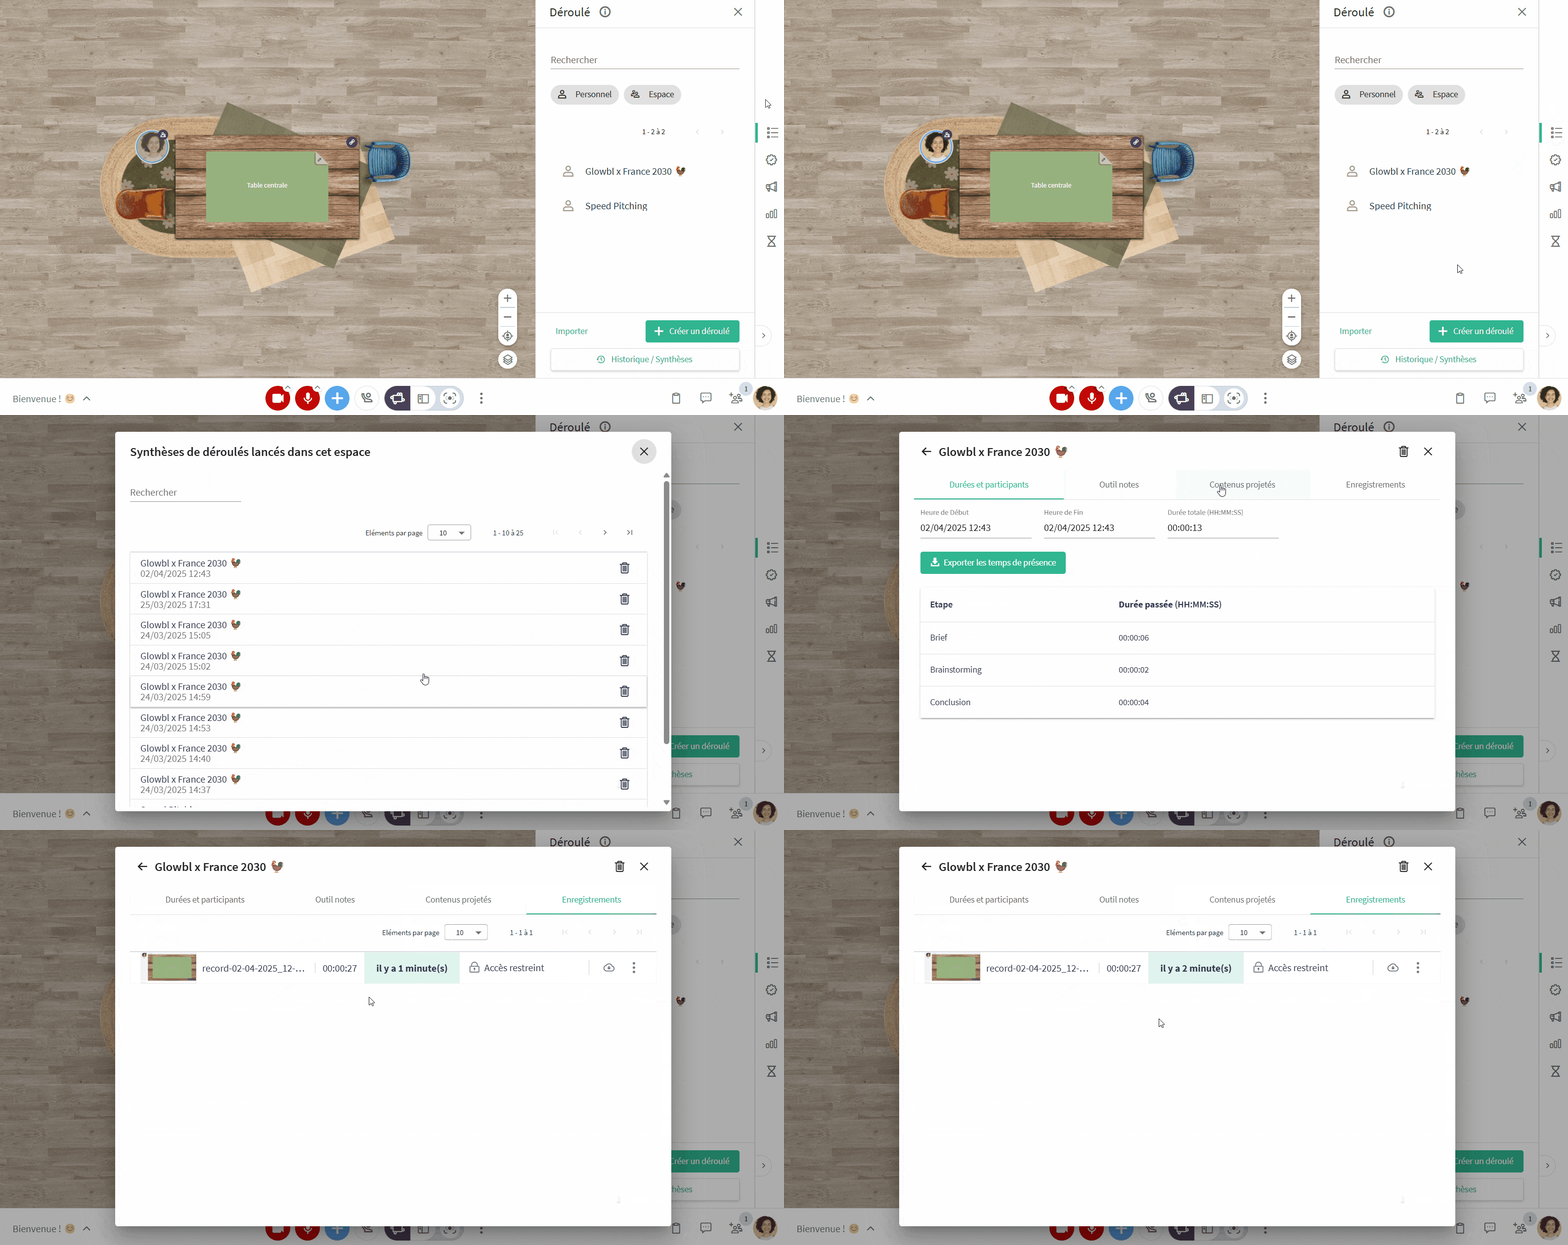
- If you record an animated session with a Scroll, the video recordings and transcripts will be part of the downloadable content from the Scroll Overview, download them or create a download link for your participants. Note that stopping the scroll does not stop the video recording. It will stop automatically at the time you have programmed, or manually.